 how-to
Metal RV Cover Installation Process: A Step-by-Step Guide
Last Updated: October 30, 2026
Quick Summary
The metal RV cover installation process begins with site prep and layout, then foundation and anchoring, frame assembly with a diagonal square check, and roof panel attachment. Most installs take a full day for a small crew, with site prep and anchoring eating the most time.
- Mark corners with stakes and string, then measure both diagonals to confirm the layout is square.
- Match anchors to your base: ground anchors for soil, wedge anchors for concrete, longer anchors for gravel pads.
- Assemble end arches on the ground and lift each with a helper, never alone.
- Do not skip the diagonal check after connecting rails, the most common cause of misaligned panels.
- Re-check anchors and fasteners after the first hard rain and first strong wind.
Table of Contents
- Metal RV Cover Installation Process: What to Expect
- RV Cover Site Preparation and Layout
- Metal Carport Foundation Options for an RV Cover
- RV Cover Anchoring Methods That Hold
- Identifying Components and Assembling the Frame
- Roof Panels, Sides, and Final Securing
- RV Cover Installation Time and Labor Expectations
- Common Installation Errors and Post-Install Checks
- Frequently Asked Questions
Metal RV Cover Installation Process: What to Expect
The metal RV cover installation process starts long before the first panel goes up.
At Direct Southern Metal Buildings, we design custom RV covers for customers across Arkansas, Kansas, Louisiana, Mississippi, Missouri, and Oklahoma.
One thing up front: this guide covers general practice. Your structure's own paperwork always wins. If the manufacturer's instructions disagree with anything here, follow the manufacturer.
RV Cover Site Preparation and Layout
Good site work supports how the rest of the build goes. A level, well-drained pad makes the frame square up easily. A sloped or soft site fights you at every step.
Start by clearing the footprint. Remove roots, rocks, and soft spots. Then check the ground conditions after rain, not before. If the soil holds ruts, it will shift under a loaded structure.
RV cover site preparation comes down to four checks:
- Slope: pick the flattest spot you have, and plan drainage away from the pad
- Access: leave room for the RV to pull in, turn, and open slides
- Utilities: call 811 before you dig any anchor holes (811 Before You Dig)
Choosing the Right Location and Orientation
Orientation matters more than most people think. Face the open end away from prevailing weather so wind and rain don't drive straight in.
Watch the sun, too. A cover that blocks the western afternoon sun keeps interior temperatures down. That's easier on upholstery, sealant, and electronics over the years.
Mark the corners with stakes and string. Measure both diagonals. If they match, your layout is square.
Metal Carport Foundation Options for an RV Cover
An RV cover needs a foundation that suits your soil and your local rules. The three common choices are ground anchors, a concrete slab, and a gravel pad with anchors.
Ground anchors suit most grass or gravel sites and install fast.
Whichever base you pick, confirm it meets local code. Many areas treat an RV cover as an accessory structure and require a permit.
RV Cover Anchoring Methods That Hold
Anchoring is the part that decides whether your cover survives a storm. The frame and panels are only as strong as their grip on the ground.
Match the anchor to the base:
- Ground anchors: driven or screwed into undisturbed soil, best where the ground stays firm
- Concrete anchors: wedge or sleeve anchors set into a cured slab
- Gravel pad anchors: longer anchors that reach firm soil below the gravel
RV cover anchoring methods should follow the manufacturer's spacing and depth specs exactly.
Tighten anchor points in stages. Snug everything first, then torque to spec once the frame is square. Check fasteners again after the first strong wind.
Identifying Components and Assembling the Frame
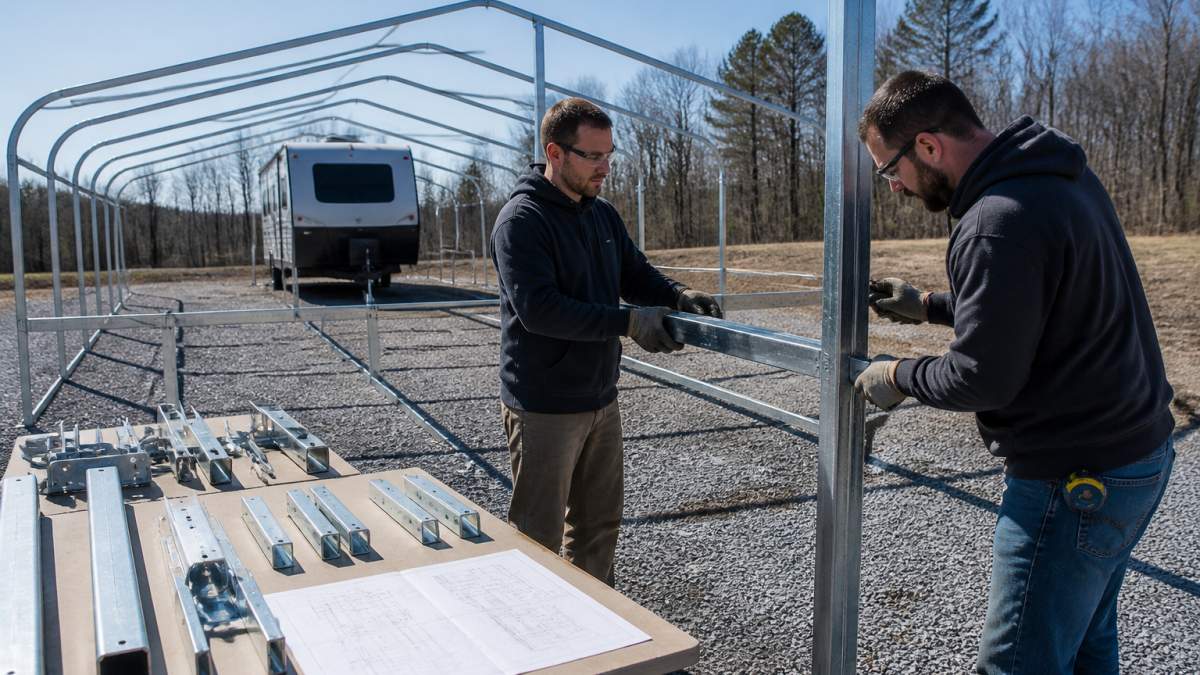
Before you pick up a wrench, turn the build into a controlled sequence. The frame is the skeleton of the whole cover, and a frame that goes up out of square or with missing parts will fight every panel, strap, and anchor that follows. Treat this stage as a series of checkpoints, not a race to stand up arches.
Step 1: Inventory and Stage the Parts
Lay out every component on a clean tarp or the driveway. Group them by the labels on the manufacturer's packing list: arches, rails, purlins, braces, fasteners, straps, and buckles.
Keep fasteners and small hardware in labeled bins or buckets. Stage the longest frame pieces along the sides of the footprint in the order they will go up.
Step 2: Read the Manufacturer Instructions End to End
Read the full instruction set before you tighten a single bolt. Pay attention to torque values, anchor spacing, panel overlap direction, and any warnings about wind or bracing. It sounds tedious, but it saves hours of backtracking later. If the manufacturer's instructions disagree with any general guidance here, the manufacturer wins.
Step 3: Assemble the End Arches on the Ground
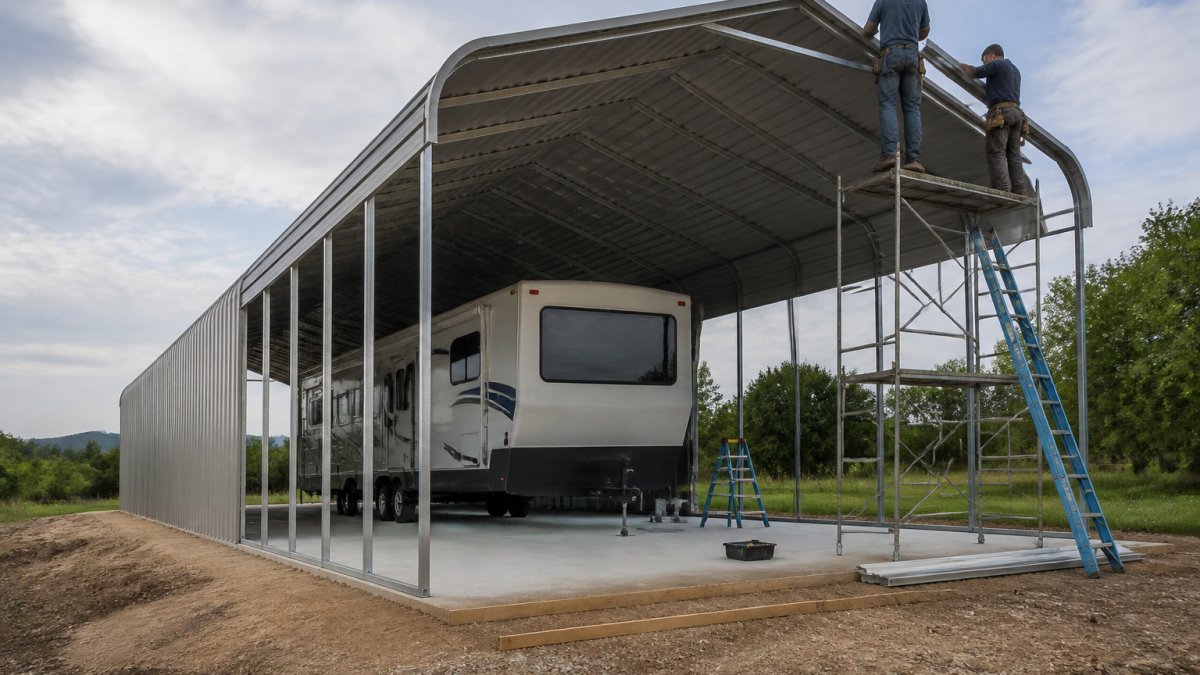
Where the instructions allow, assemble the end arches flat on the ground. Bolt the arch sections together per the diagram, leaving fasteners snug but not fully torqued. Build both end arches first, they set the width and height for everything else. Lift each arch into place with a helper, not alone. Long arches are awkward and heavy; two people with gloves and eye protection are the minimum.
Step 4: Connect the Rails and Check Square
With the end arches standing, connect the longitudinal rails per the diagram. Then check square immediately. Measure both diagonals from corner to corner. If they match, the frame is square. If they do not, adjust the bracing or rail connections before you go further. A frame that is out of square at this stage will never sit right, and the roof panels will show it.
Step 5: Install Bracing and Purlins
Add the bracing and purlins in the order the instructions specify. Bracing keeps the frame from racking while you handle roof panels. Snug all connections first, then torque to the manufacturer's spec once the frame is square and braced. If the frame will sit overnight before roofing, secure it against wind per the instructions, an unroofed frame can act like a sail.
Step 6: Final Frame Checkpoint Before Roofing
Before any roof panel goes on, walk the frame and confirm:
- All arches and rails are connected per the diagram
- Diagonals still match after bracing
- Fasteners are snug and ready for final torque
Only then move to roof panels. This checkpoint is what separates a clean install from a day of rework.
Roof Panels, Sides, and Final Securing
Roof panels go on in the order the instructions specify, usually working from one end to the other. Overlap each panel the correct direction so water sheds off, not under.
Next, pull down the sides and secure them to the frame. Attach straps and buckles as shown, and tension them evenly. A side panel that flaps will wear through at the fastener holes within a season.
Final securing means a full walk-around:
- Check every fastener for snugness
- Confirm all anchor points are torqued to spec
- Verify straps are tight and buckles are locked
RV Cover Installation Time and Labor Expectations
Most RV cover installs take a full day for a small crew, and longer for larger spans or a concrete base. Site prep and anchoring eat the most time. Frame and panel work moves faster once the base is set. But the real question is not just how long it takes, it is who should be doing it, with what equipment, and under what safety plan.
What Drives the Timeline
RV cover installation time depends on four things:
- Structure size and span
- Base type and how much prep the ground needs
- Crew size and experience
A concrete slab adds cure time before anchors can be set, so plan for that in the schedule. A sloped or soft site adds prep time. A tight site with limited access slows every lift.
Crew Size and Tools
Larger spans and taller legs are a different story, long roof panels and high rails are awkward and heavy, and the risk of a fall or a dropped panel rises fast. At minimum, plan for:
- Two people for lifting and holding long components
- Ladders rated for the load and set on firm, level ground
- Work gloves, eye protection, and head protection
Safety Plan Before the First Bolt
A clear safety plan is part of the schedule, not an afterthought. Check the wind forecast, do not handle long panels or stand up arches in gusty conditions. Keep ladders clear of overhead lines. Never lift a panel alone. If the structure is tall or the site is tight, the safer call is to hire professional installers rather than improvise. If you go that route, How to Find Metal Building Contractors walks through finding qualified installers.
DIY Versus Hiring a Crew
Doing it yourself is possible on smaller units with two or three people and the right tools. Larger spans, taller legs, and concrete bases are where DIY gets risky. If you'd rather not manage the build, you can ask about installation help when you request a quote.
Whichever route you choose, confirm the crew has read the manufacturer's instructions and will follow the anchor spacing and torque specs. A fast install that skips those steps is not a shortcut, it is a callback waiting to happen.
Here is what drives the schedule for a metal RV cover install.
| Factor | Effect on timeline |
|---|---|
| Structure size and span | Larger spans take longer |
| Base type and ground prep | Concrete slab adds cure time |
| Crew size and experience | Bigger, experienced crews move faster |
| Weather and site access | Gusty wind and tight sites slow work |
| Site prep and anchoring | Eat the most time |
| Frame and panel work | Moves faster once base is set |
Common Installation Errors and Post-Install Checks
The same mistakes show up again and again. Watch out: skipping the diagonal square check is the big one.
Other frequent errors:
- Anchors set in loose fill instead of firm soil
- Panels overlapped the wrong way, so water runs under the seams
- Fasteners overtightened and dimpling the steel
After the build, do a post-install inspection. Walk the perimeter, check anchors and fasteners, and confirm drainage runs away from the pad.
If you'd rather start with a clear plan, you can request a free quote from Direct Southern Metal Buildings.
Frequently Asked Questions
How long does it take to install a metal RV cover?
For a typical DIY crew of two to three people, frame assembly and panel installation usually take one to two days, depending on the size and complexity of the cover. Site preparation and foundation work can add another day or more. Professional installation teams often complete the structure faster because they work with the components daily. RV cover installation time also depends on weather, ground conditions, and whether the site is already level and cleared.
Does the ground need to be level for a metal RV cover?
Yes. A level, compacted surface is essential for proper frame alignment and anchoring. If the ground is uneven, the frame can twist, panels may not fit correctly, and anchor points may not hold. Grading and compacting the site before assembly prevents these problems. For sloped lots, a foundation option such as a concrete slab or gravel pad can create a flat base. Proper RV cover site preparation is the first step toward a structure that lasts.
Can I install a metal RV cover myself?
Many homeowners assemble a metal RV cover themselves with a helper or two, especially when the manufacturer provides clear instructions and labeled components. The work involves lifting steel frames and roof panels, so plan for safe lifting and use ladders carefully. If you are not comfortable working at height or reading technical plans, a professional installation service removes the risk. Always follow the manufacturer's instructions and local building requirements.
What should I check after a metal RV cover is installed?
Walk the structure and check every fastener, strap, and anchor point for tightness. Confirm that roof panels overlap correctly and that the frame is square. Look for any gaps where weather could enter. Verify that the cover clears your RV's height and width with room to maneuver. Finally, review your anchoring methods against the manufacturer's recommendations and schedule a follow-up inspection after the first strong wind or heavy rain.
Getting an RV cover right comes down to preparation, patience, and following the manufacturer's specs to the letter. At Direct Southern Metal Buildings, we build custom covers sized to your RV, your property, and your budget. You choose the size, doors, windows, and colors, and we design around your lot and plans. Get started with Direct Southern Metal Buildings and get a free quote on a cover built for your rig.